If cooking is an art, baking is definitely a science. When I was training at IHM, this was one of the first things they taught us—and for good reason. Today, I want to share why being exact with your measurements makes such a big difference in baking and how you can use some pro tricks in your own kitchen.
PS: During my Grand Hyatt training our Sous Chef used to beat the weighing scale by measuring flour with a fist full of flour…
Weighing vs. Measuring Cups
Go into any professional bakery, including the restaurants where I worked, and you’ll see digital scales, not measuring cups. There’s a good reason for this! Using cups and spoons has some real problems. Flour can vary by up to 30% depending on how you fill the cup. Different brands of measuring cups aren’t the same size. Plus, everyone scoops differently, which leads to inconsistent results.
Weighing ingredients in grams is much better because it’s exact no matter how dense the ingredient is. Your recipes turn out the same every time. It’s also easier to make larger or smaller batches, and you use fewer dishes since you can weigh everything in one bowl. Even just 10 grams too much flour can turn a soft, moist cake into a dry one. That’s a huge difference from such a small amount!
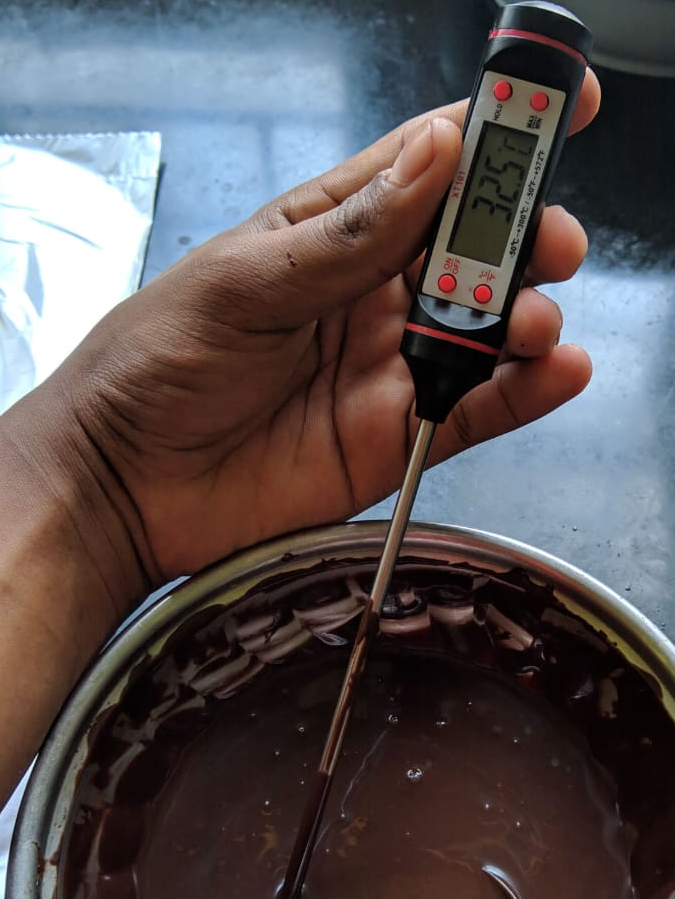
Tools You Need for Exact Baking
To measure like the pros, you’ll need a few essential tools. A digital scale is absolutely must-have. Get one that measures in 1g units and has a zero button. One that shows both grams and ounces is super helpful for following different recipes.
An oven thermometer is really important too. Most home ovens are off by 10-25°C. I was shocked when I discovered my sasta wala OTG was running 30 degrees too hot. No wonder some of my cookies were burning!

An instant-read thermometer helps you know when custards, caramels, and bread are perfectly done. I still use measuring spoons for really small amounts like baking powder and spices.
Temperature Matters Too
Temperature affects almost everything about baking, but it’s something home bakers often overlook. I know I did when I first started!
Cold butter won’t mix properly with sugar for cookies. Room temperature eggs trap more air when you beat them. And warm cookie dough spreads way more in the oven – I learned this the hard way during a college days when all my cookies turned into one giant flat cookie!
Mixing creates heat that warms up your dough, which is why professional kitchens sometimes use ice water to keep dough cool. The oven temperature affects how things rise, brown, and lose moisture, which is critical for proper texture.
I’ve made so many measuring mistakes over the years! The biggest one is measuring flour incorrectly. If you scoop directly with the measuring cup, you’ll end up with 20-30% too much flour. Instead, spoon flour into the cup, then level it off with a knife.
Using drinking cups or eating spoons instead of proper measuring tools is another common mistake. I once watched my sister use a regular spoon for a “tablespoon” of baking powder. Her cake ended up tasting bitter and metallic! Guessing small amounts is tempting but risky. Too much baking powder can make your cake collapse or taste bitter. Not enough and it won’t rise properly and please use the right measuring tools for each job. Measuring oil in a dry measuring cup means you’ll never get the exact amount, plus you waste ingredients trying to scrape it all out.
How Pros Write Recipes & Tips
Baker’s percentages completely changed how I understand recipes. It’s a simple system that shows all ingredients as percentages of the flour weight (flour is always 100%).
For example, a basic bread dough might be: flour 100% (500g), water 65% (325g), salt 2% (10g), and yeast 1% (5g).
This makes it super easy to scale recipes up or down without complicated math. It also helps you compare recipes quickly and spot why one bread might be denser or lighter than another or it could be just over or under kneading of dough, lol
The biggest game-changer for my home baking was adopting mise en place – getting everything ready before starting. Measure all ingredients and put them in separate containers. Double-check amounts against the recipe. This professional habit has saved me countless times from realizing halfway through that I’m out of an ingredient!
For room temperature ingredients, butter should dent slightly when pressed, not be shiny or oily. If your eggs are cold, put them in warm water for 5 minutes – a trick I learned from our pastry chef that saves so much time.
When measuring liquids, put the cup on a flat surface and check at eye level. For sticky ingredients like honey, I spray the measuring cup with oil first. Even better, I weigh my container before and after adding honey – the difference is exactly how much I’ve used, with no waste!
Your Challenge This Week
I challenge you to bake your favorite recipe twice: first using your usual measuring methods, then using weight measurements. You can find conversion charts online easily.
Take notes on the differences. Does the dough feel different? Does the final product look or taste different? Many of my friends were shocked at how much better their baking got with this simple change.
Next time, we’ll look at mixing methods and why understanding the science behind them gives you more control over texture. Until then, I’d love to hear: what’s your biggest measuring challenge when baking? Drop a comment below!


Leave a comment